Pinterest Tips & Strategies

How to Tag Products on Pinterest

By Spencer Lanoue
October 31, 2025

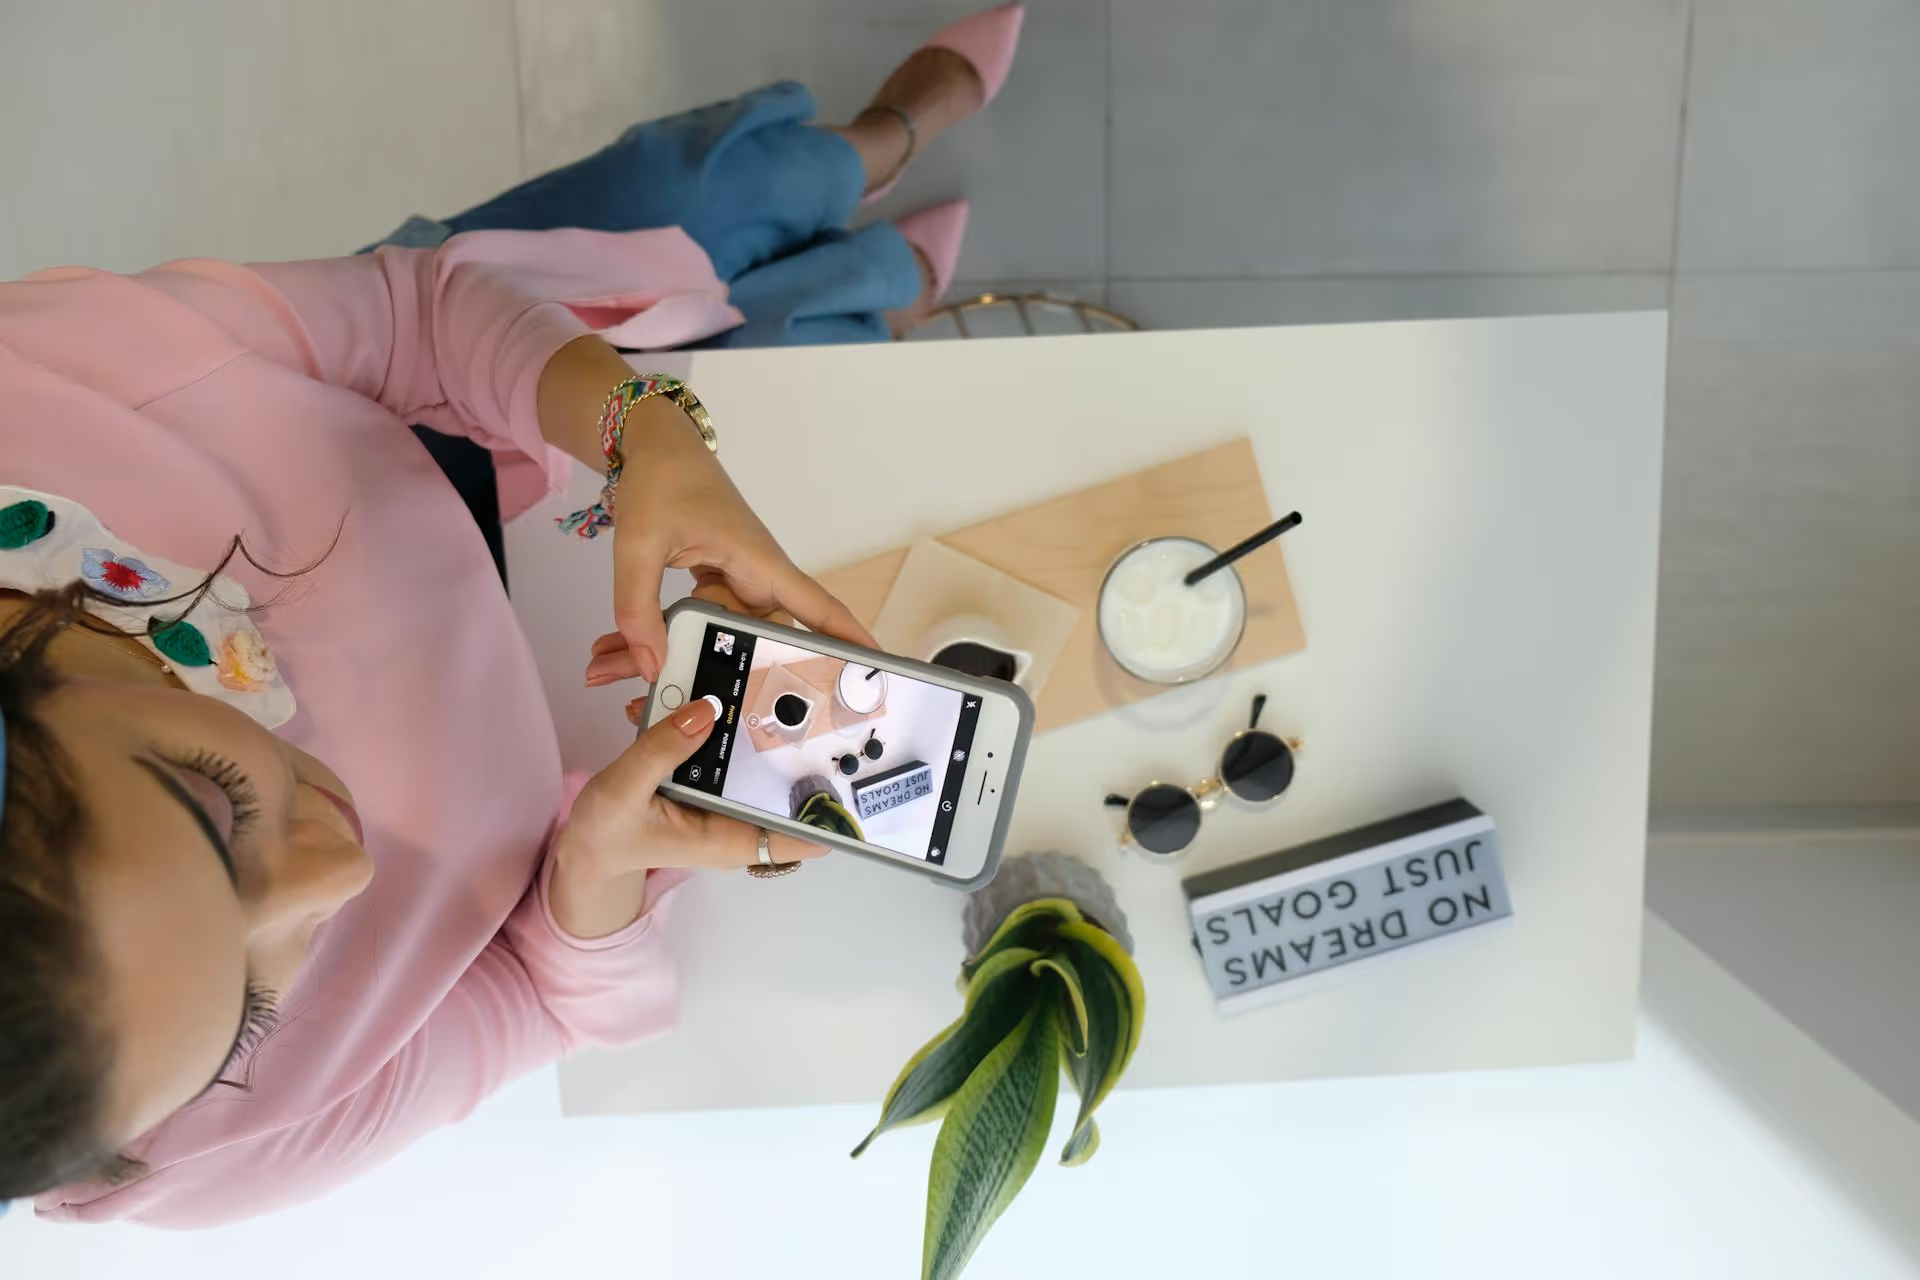
Turning your Pinterest boards into a browsable, shoppable storefront is one of the most direct ways to convert inspiration into sales. Learning how to tag your products correctly is the skill that makes it all possible. This guide will walk you through exactly how to tag products on Standard Pins and Idea Pins, set up automated Product Pins, and follow best practices to make your content shoppable and effective.

Why Tagging Products on Pinterest is a Game-Changer

Unlike other platforms where shopping can feel disruptive, Pinterest users expect to find products and plan purchases. It’s a platform built on discovery and inspiration, making it a natural environment for e-commerce. Tagging your products closes the gap between someone seeing an item they love and adding it to their cart.

  • Shortens the Buyer's Journey: Instead of a user seeing your product, searching Google for it, and hoping they find the right store, they can click a tag and go directly to your product page. It removes friction and drastically increases the chance of conversion.
  • Creates an Interactive Experience: Shoppable tags offer more than just a link - they provide real-time information like price and stock availability directly on the Pin, making the content dynamic and useful.
  • Boosts Discoverability: Tagged products are more likely to appear in dedicated shopping surfaces on Pinterest, like the Shop tab in search results, expanding your reach to users with high purchase intent.

Getting Started: Your Pre-Tagging Checklist

Before you can tag products, there are a few foundational steps you need to complete. Make sure you have these things in order to ensure a smooth and successful process.

  • A Pinterest Business Account: Product tagging is a feature exclusive to business accounts. If you’re still using a personal profile, you can convert it for free in your account settings.
  • A Claimed Website: You must claim your online store’s domain with Pinterest. This verifies that you own the website you're linking to and unlocks access to analytics and other business features.
  • Compliance with Merchant Guidelines: Your product and website must adhere to Pinterest's Merchant Guidelines. This generally means having clear shipping and return policies, accurate product representations, and selling items that fit within their allowed categories.

How to Tag Products on a Standard Pin

This is the most common and versatile way to make your content shoppable. Use this method for single-image Pins, “shop the look” layouts, or any Pin where one or more products are clearly featured.

Step-by-Step Instructions:

  1. Create a New Pin: From your Pinterest profile, click the "Create" button in the top-left corner and select "Create Pin."
  2. Upload Your Visuals: Upload a high-quality photo or video that showcases your product in an appealing context. Lifestyle images where the product is being used often perform better than standalone product shots on a plain background.
  3. Look for the Tag Icon: On the right side of the Pin editor, you'll see a panel for details. Look for an icon that looks like a price tag (or you might see text that says "Tag products"). Click on it.
  4. Add Your Product Link: A new menu will appear over your image. You have two main options:
    • Add by URL: This is the most direct way. Paste the URL of the product page from your website. Pinterest will fetch the product details like title, description, and price. Select the correct product image from the options that appear and click "Add Pin."
    • Select from Your Catalog: If you've already set up a Product Catalog (more on that later), you can simply search for the product by name. This is faster and ensures all the data is pre-validated.
  5. Position the Tag: A small dot will appear over your image representing the product tag. Click and drag this dot to place it directly on the product you’re tagging. You can tag up to 8 products per Standard Pin. Repeat Step 4 for any additional items.
  6. Fill in the Details and Publish: Once your products are tagged, complete the rest of your Pin. Write a compelling, keyword-rich title and description, add it to your most relevant board, and click "Publish." Your Pin is now shoppable!

How to Tag Products in Idea Pins

Idea Pins are Pinterest’s multi-page video and image format, perfect for telling stories, sharing how-to guides, or creating lookbooks. Tagging products here allows you to integrate shopping naturally into engaging, sequential content.

Step-by-Step Instructions:

  1. Create an Idea Pin: Click "Create" and choose "Create Idea Pin." Upload your videos and images to create the pages of your story.
  2. Find the Stickers Menu: On each page, you'll find an editing menu. Tap the "Stickers" icon. This is where you'll find various interactive elements.
  3. Select the "Product" Sticker: Inside the stickers menu, look for one labeled "Product." This opens the product tagging interface.
  4. Choose Your Tagging Method:
    • Tag an Existing Pin: You can select one of your existing Product Pins (either manually created or from a catalog). This is great if you want to feature well-performing content again.
    • Add by URL: Just like with Standard Pins, you can paste a direct product link from your site. Pinterest will pull the data and create a product sticker that you can customize.
  5. Place and Customize: Position the product sticker anywhere on the page. You can often change the color and style to match your Pin’s aesthetic. You can add multiple product stickers to each page.
  6. Repeat for All Pages: Go through each page of your Idea Pin and add product tags where relevant. This is perfect for things like a recipe Idea Pin where you tag the cookware used, or a fashion lookbook where you tag each piece of an outfit on a separate slide.
  7. Publish Your Idea Pin: Complete the details (title, description, board, topic tags) and hit "Publish."

Level Up: Automate with Product Catalogs

For businesses with more than a handful of products, manually creating a Pin for every item is not sustainable. This is where Pinterest Catalogs come in. A Catalog uses a data source feed from your e-commerce store (like Shopify or BigCommerce) to automatically create - and update - a Product Pin for every item in your shop.

What is a Catalog?

A catalog is essentially a file that contains all your product information - titles, images, prices, stock levels, product page URLs, and more. When you upload this file to Pinterest, it generates a unique, shoppable Pin for each product automatically.

The Benefits of Using a Catalog

  • Automation and Scale: Instantly create thousands of Product Pins without manual effort.
  • Real-Time Updates: If you change a price or an item goes out of stock on your website, the connected Product Pin updates automatically. No more sending traffic to sold-out pages.
  • Improved Targeting for Ads: Having a catalog is essential for running dynamic Shopping Ads and retargeting campaigns on Pinterest.

Setting up a Catalog is a more technical process involving your e-commerce platform's integration with Pinterest or generating a data feed file. While more involved initially, the time saved and the accuracy it provides are invaluable for any serious brand on the platform.

Best Practices for Stand-Out Shoppable Pins

Just knowing how to tag products isn’t enough. Here’s how to do it effectively to drive more clicks and sales.

  • Use Lifestyle Imagery: Show your products in real-life settings. A throw blanket looks better styled on a couch than folded on a white background. Help users imagine your product in their own lives.
  • Create "Shop the Look" Pins: Display multiple products together in one image - like a full outfit or a styled room - and tag each coordinating item. This encourages larger orders and cross-sells complementary products.
  • Be Hyper-Specific: Make sure the dot for the product tag is placed directly on top of the correct item, and that it links to the exact product page for the color and style shown. Mismatches create a poor user experience.
  • Don’t Overclutter Your Image: While you can tag up to 8 products, keep your imagery clean and visually appealing. If the tags make the image feel cluttered, consider showing fewer items.
  • Optimize Your Product Descriptions: The details from your Product Pins are searchable. Ensure your product titles and descriptions on your website are clear, descriptive, and contain relevant keywords people might use to find them.

Final Thoughts

Tagging products on Pinterest transforms your profile from a simple mood board into a powerful e-commerce engine. By making your Pins shoppable through Standard Pins, Idea Pins, and automated Catalogs, you seamlessly guide users from the moment of inspiration directly to your checkout page.

To keep the inspiration fresh and your audience engaged, maintaining a consistent pinning schedule is absolutely essential. We know that creating that much content can be demanding, which is why we built Postbase with a visual calendar that lets you organize and schedule all your content - including Pinterest - weeks or even months ahead. By planning your shoppable content in advance, you can stop scrambling to post and focus on building a brand people love to shop from.

Spencer's spent a decade building products at companies like Buffer, UserTesting, and Bump Health. He's spent years in the weeds of social media management—scheduling posts, analyzing performance, coordinating teams. At Postbase, he's building tools to automate the busywork so you can focus on creating great content.

Other posts you might like

How to Add Social Media Icons to an Email Signature

Enhance your email signature by adding social media icons. Discover step-by-step instructions to turn every email into a powerful marketing tool.

Read more

How to Add an Etsy Link to Pinterest

Learn how to add your Etsy link to Pinterest and drive traffic to your shop. Discover strategies to create converting pins and turn browsers into customers.

Read more

How to Grant Access to Facebook Business Manager

Grant access to your Facebook Business Manager securely. Follow our step-by-step guide to add users and assign permissions without sharing your password.

Read more

How to Record Audio for Instagram Reels

Record clear audio for Instagram Reels with this guide. Learn actionable steps to create professional-sounding audio, using just your phone or upgraded gear.

Read more

How to Add Translation in an Instagram Post

Add translations to Instagram posts and connect globally. Learn manual techniques and discover Instagram's automatic translation features in this guide.

Read more

How to Optimize Facebook for Business

Optimize your Facebook Business Page for growth and sales with strategic tweaks. Learn to engage your community, create captivating content, and refine strategies.

Read more

Stop wrestling with outdated social media tools

Wrestling with social media? It doesn’t have to be this hard. Plan your content, schedule posts, respond to comments, and analyze performance — all in one simple, easy-to-use tool.

Schedule your first post
The simplest way to manage your social media
Rating