

How to Add Social Media Icons to an Email Signature
Enhance your email signature by adding social media icons. Discover step-by-step instructions to turn every email into a powerful marketing tool.
Most viewers watch YouTube Shorts with the sound off, which means your perfectly crafted audio is often lost in silence. Adding subtitles is no longer just an accessibility feature - it's a critical tool for grabbing attention and keeping people watching. This guide breaks down exactly how to add captions to your Shorts, from YouTube's simple built-in tool to third-party apps that give you complete creative control.
Before jumping into the "how," it's worth understanding the "why." Adding text to your videos isn't just another item on your pre-publish checklist - it fundamentally improves your content's performance. Here’s how:
If you're looking for the quickest and most straightforward way to add subtitles, YouTube's native tool is your best bet. It’s built right into the app, requires no extra downloads, and gets the job done in just a few taps. It may not offer the fancy animations of other apps, but for clean, effective captioning, it's a fantastic starting point.
Let's walk through the process, screen-by-screen.
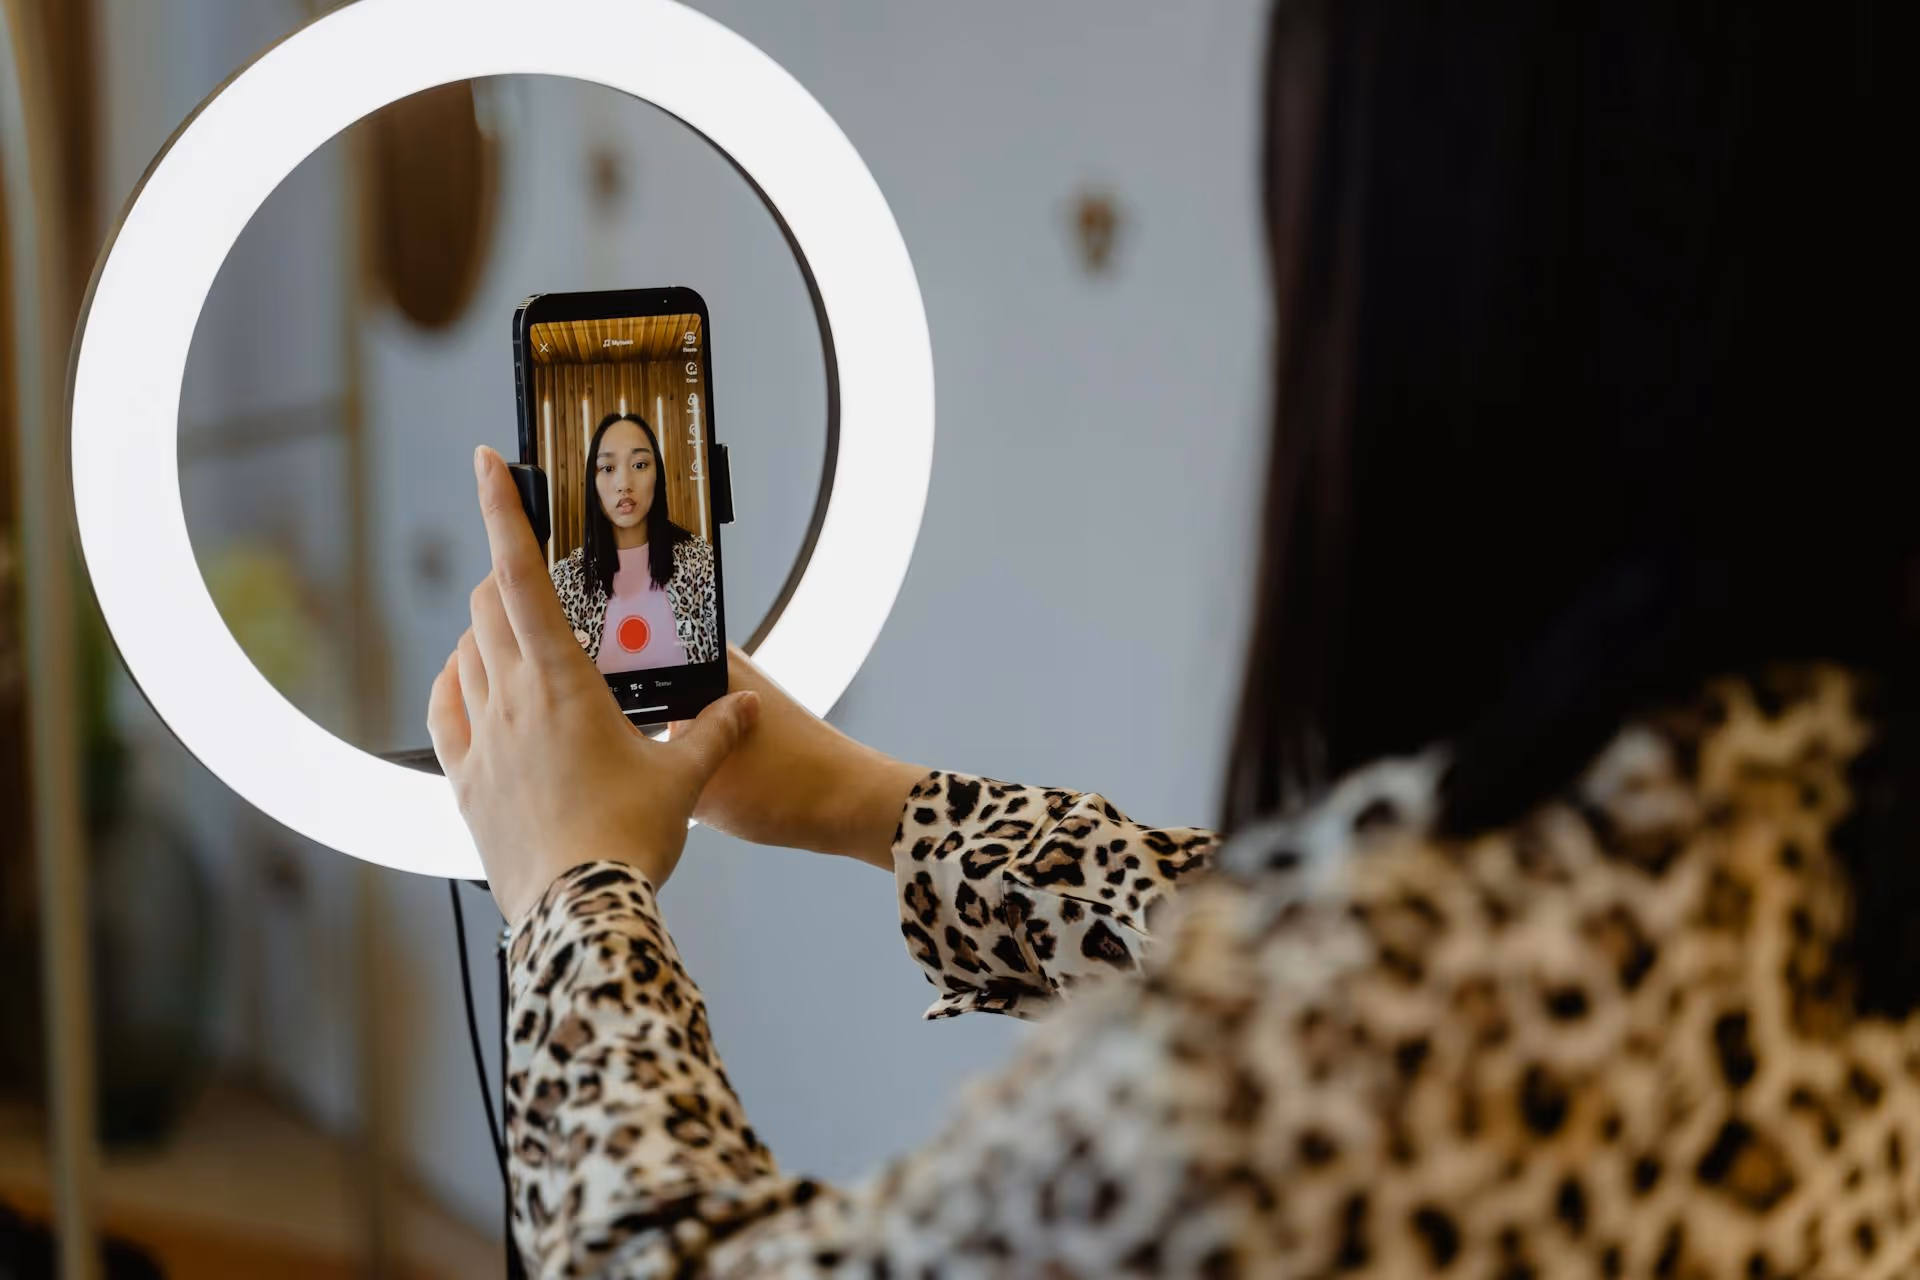
Start the process as you normally would. Open the YouTube app, tap the large + icon at the bottom of the screen, and select "Create a Short." You can either record a new clip directly in the app or upload a pre-edited video from your camera roll.
Once you’ve recorded or selected your video, hit the checkmark in the bottom right corner to move to the next screen. Here, you can add sound, filters, or text overlays. When you're ready to proceed to captions, tap "Next" to enter the final editing interface where you add your details.
On this screen, you'll see a row of editing tools at the bottom. Tap on the "Captions" option. The icon is usually [Aa] or something similar signifying text. Give YouTube a moment while it processes your audio and automatically generates a transcription of everything said in the video.
This is the most important step of this method. Auto-generated captions are almost never 100% accurate. They frequently mishear names, technical terms, or slang. They also tend to lack proper punctuation, turning a clear sentence into a run-on mess.
YouTube will display your video timeline with the transcribed text broken into editable clips. Tap on each block to correct spelling, add commas and periods, and fix any misunderstood words. Don't skip this, a typo-filled caption can make your content look unprofessional and undermine your message.
While editing the text, you can also adjust the timing. Simply drag the handles on the text block in the timeline to make it appear earlier or later, or to shorten or extend its duration. The goal is to make the words appear on screen in perfect sync with when they are spoken.
Once the text is accurate, you can customize its appearance. YouTube provides several options to help your subtitles stand out. You can change the font style, the alignment, and the text color. The most useful feature is the ability to add a background or outline to the text, which is essential for ensuring readability against a busy or changing video background.
After you’re happy with the edits and styling, tap "Done." Add your Short's title, choose your visibility settings, and hit "Upload Short." That's it! Your video will now have clear, readable subtitles generated right within the YouTube platform.
While YouTube's tool is convenient, top creators often use a different method for those stylish, animated subtitles you see everywhere. These are called "burned-in" or "open" captions because they are permanently embedded into the video file itself. This method gives you complete creative freedom over how your text looks and behaves.
Many apps handle burned-in subtitles, but CapCut is a popular and free option that’s packed with professional features. The general process is similar across most video editing apps.
First, edit your raw video footage. Get your cuts, color grading, and audio just right. Then, import this final video file into CapCut (or your chosen editor) to begin the subtitling process.
Navigate to the "Text" menu and find the "Auto Captions" feature. The app will transcribe your audio, just like YouTube's tool. Your job, once again, is to meticulously proofread and correct every single line for accuracy and punctuation. This is also your chance to strategically break up lines for better readability. Instead of "Today I'm going to show you three easy tips to improve your videos," you might break it into:
This pacing makes the text much less intimidating to read.
Here’s where you can get creative. In the "Style" menu, you can select custom fonts, add shadows or glows, and choose colors that match your brand. Move to the "Animation" tab to add effects. A very popular and effective technique is a "karaoke-style" or word-by-word animation where each word highlights as it's spoken. This draws the viewer's eye through the sentence and keeps them hooked on what's coming next.
Drag your text block into the correct position on the screen, being mindful of the YouTube interface. Finally, export your video in high resolution (1080p is standard). The resulting video file will have the beautiful subtitles burned directly into it.
Now, just open the YouTube app and upload this new, complete video file as a Short. Since the captions are already part of the video, you can skip YouTube's "Captions" editing step entirely.
Regardless of the method you choose, follow these principles to make sure your subtitles are effective.
Adding subtitles to your YouTube Shorts is a small investment of time that pays huge dividends in engagement, accessibility, and professionalism. Whether you use YouTube's fast auto-captions for a quick upload or a third-party app to create branded, animated text, you're making a choice to create more effective content that reaches a wider audience.
After perfecting your subtitled Short, the next step is making sure it gets seen. Juggling different content formats and platform schedules can be a real headache. I know that feeling because we felt it, too, which is why we built Postbase. Our visual calendar lets you plan your Shorts alongside your TikToks, Reels, and other social content, all in one clean view. It’s a modern tool designed to handle today’s video-first reality, helping you schedule reliably so you can focus on creating great content, not fighting with your software.
Spencer's spent a decade building products at companies like Buffer, UserTesting, and Bump Health. He's spent years in the weeds of social media management—scheduling posts, analyzing performance, coordinating teams. At Postbase, he's building tools to automate the busywork so you can focus on creating great content.

Enhance your email signature by adding social media icons. Discover step-by-step instructions to turn every email into a powerful marketing tool.
Record clear audio for Instagram Reels with this guide. Learn actionable steps to create professional-sounding audio, using just your phone or upgraded gear.
Check your Instagram profile interactions to see what your audience loves. Discover where to find these insights and use them to make smarter content decisions.
Requesting an Instagram username? Learn strategies from trademark claims to negotiation for securing your ideal handle. Get the steps to boost your brand today!
Attract your ideal audience on Instagram with our guide. Discover steps to define, find, and engage followers who buy and believe in your brand.
Activate Instagram Insights to boost your content strategy. Learn how to turn it on, what to analyze, and use data to grow your account effectively.
Wrestling with social media? It doesn’t have to be this hard. Plan your content, schedule posts, respond to comments, and analyze performance — all in one simple, easy-to-use tool.

